Read More http://www.kevinandamanda.com/whatsnew/tutorials/how-to-use-a-cute-font-for-your-blogger-post-titles.html#ixzz1jxx00grU

Thursday, August 11, 2011

Slice of Tasty: The Quinoa Way

I don't know about you, but when I don't follow a recipe, I go overboard.

Blame it on me keeping the fridge well stocked with the food I love. Obviously. So, when I decide to throw something together, I want to throw it ALLLL together. Believe me, it can get weird. Every once in a while it doesn't turn out like my taste buds imagined, but I won't share those flops with you.

What I will share is the dish that took me twenty-seven minutes to make, and roughly twenty-four SECONDS to consume. Not to toot my own horn, but it was that good : )

Side Note:  I'm a RICE LOVER. Not the brown rice that is decent for you. The starchy, long-grain, jasmine white rice. The unhealthier one. Story. of. my. life.

Well, folks, I've found a new substitution that I almost equally love and is much healthier. A protein. Quinoa.

This recipe, (that I promise I will get to. . . eventually) is the 4th meal I've made this week, that included Quinoa. It truly is versatile. You can prepare it SOOO many ways. And this is one of them.


When I began to concoct this dish, I knew of course that the base would be the quinoa, but like I mentioned at the beginning of the post, I couldn't decide what to add and leave out. Some of the options from the pantry/fridge were sun dried tomatoes, onions, capers, spinach,  an avocado, hummus, cauliflower, broccoli, artichokes, garlic, plum tomatoes, and so on. TOO many decisions. Really did contemplate adding it all, but that would be overboard, and my need for a quick lunch didn't allow it.

So this is what I ended up using. Minus the hummus and plus some seasonings.


INGREDIENTS - all approx. I didn't exactly measure when I made it ( :

1/2 cup - uncooked, pre-washed, quinoa (make sure it is pre-washed so you don't have to worry about rinsing it yourself and removing all the bitter coating)
1/2 cup - chicken or vegetable broth
1/2 avocado
couple handfuls of baby spinach
1 sweet onion
1/2 tsp garlic
teal knife ( : (optional)
S&P to taste
few drops of sriracha or a hot sauce of your choice.

DIRECTIONS

First cook the quinoa. You can prepare it ahead of time like I did the night before( just left overs from my previous quinoa meal), but to cook it you just add the quinoa, broth, and 1/2 cup of water to a small pot. Turn the heat on high. Once it starts boiling, turn the heat down, cover it, and let it simmer for about 15 min or until the liquid is absorbed.

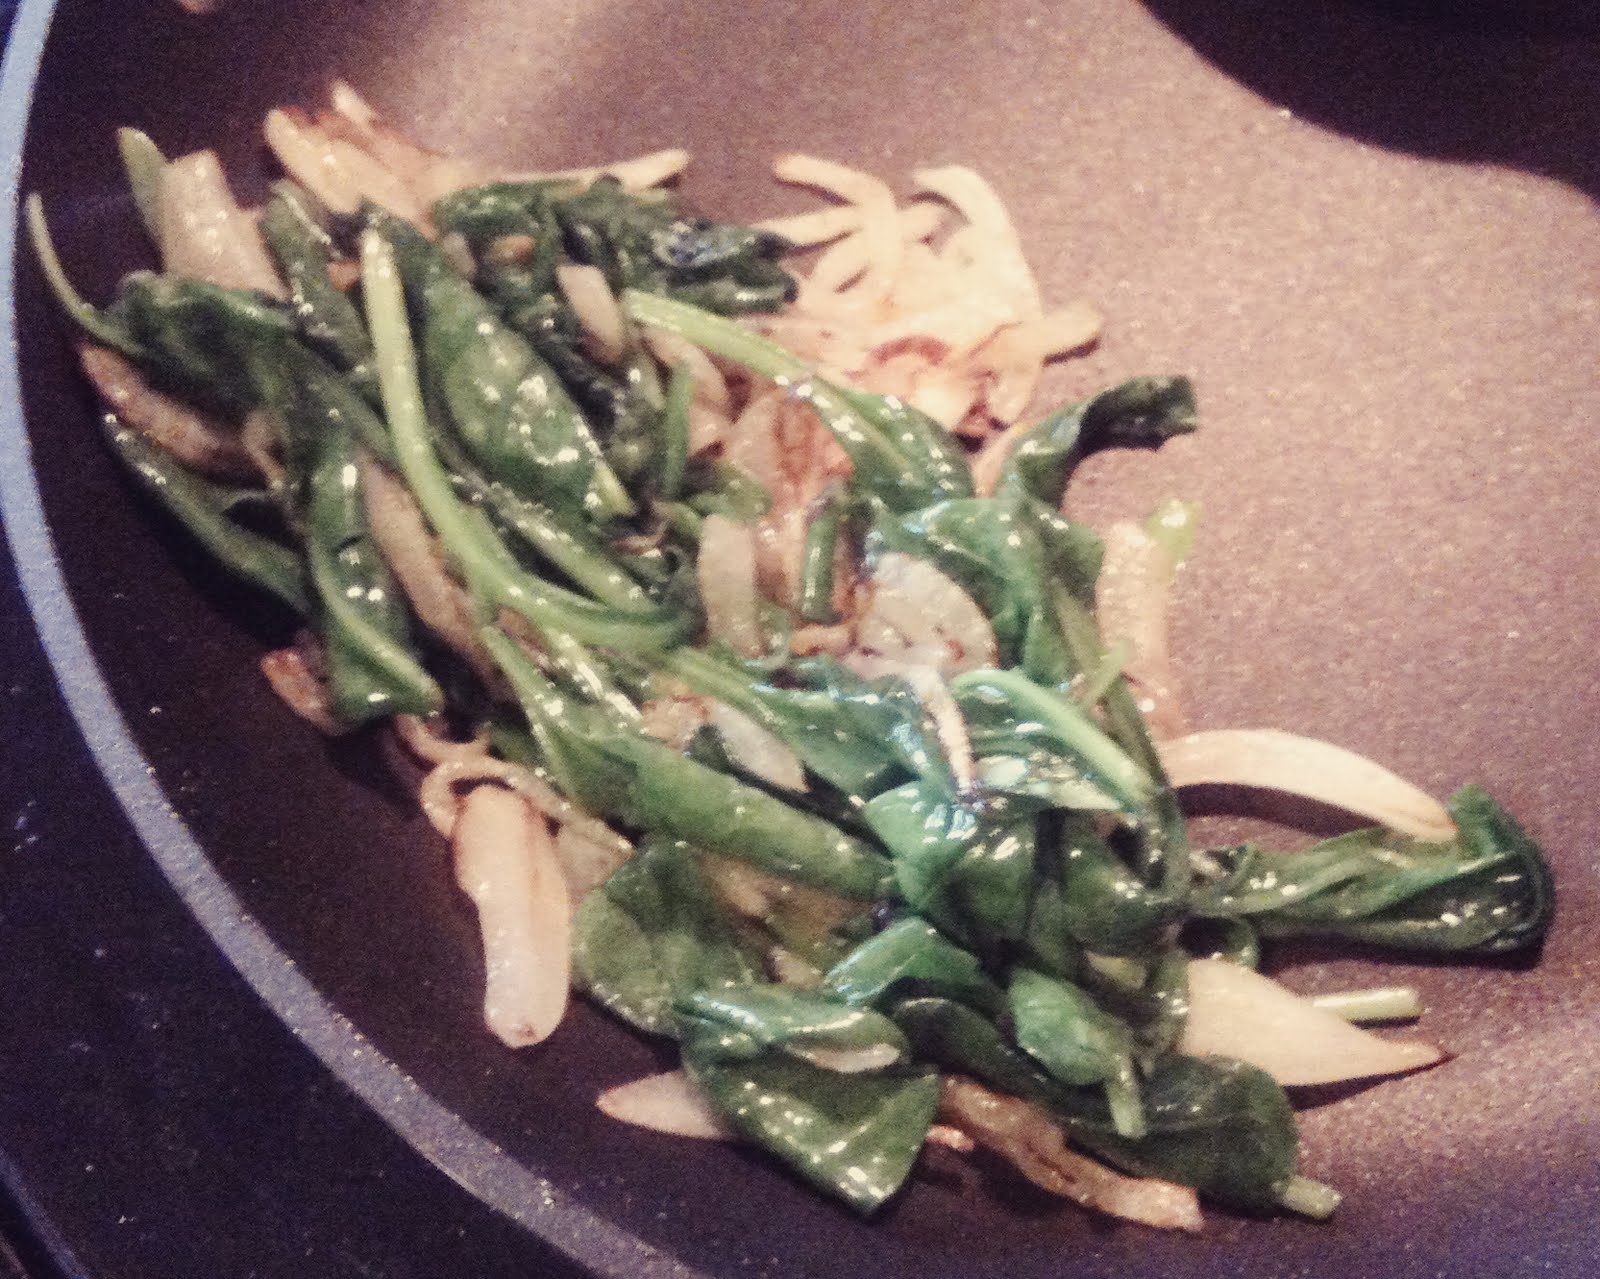
Next, slice your sweet onion and saute it. Just like in the brussel sprout recipe.

It should look something like this. You know. 

Then, add the spinach until it wilts and looks something like this.


After that, add the garlic. Then the avocado (you could slice it up before you add it, but I just scooped the half out and sliced it up with my spatula while I was stirring it in). Throw in 1/2 cup of the cooked quinoa, S&P, and sriracha. Stir around for a bit, til its nicely mixed and smell-good. 

You know what to do next.

This only made one serving and I probably could have eaten for 3. So if your hungry or you make it for more than one, definitely double it ( :

Wednesday, July 27, 2011

just a bit of silliness

While trying to purge and organize the million folders on my mac, I came across this. . .


While patiently waiting for our 
  mother to run into AT&T for something "quick". . . 

(which OF COURSE, typically turned into an HOUR.)

we did only what a normal 17 and 7 year old would do . . . 

THANK GOODNESS WE HAD A CAMERA.

Saturday, July 2, 2011

It's a HOLIDAY!


Here are a few of my favorite, 
SIMPLE entertainment ideas for the weekend! 

IDEA #1:

I LOVE this patriotic garland! Such a fun project to make the Saturday before the 4th. *wink,wink*


TREATS and MORE TREATS


IDEA #2:


Around my family it's not  an independence day celebration without 
watermelon and berries of some sort ( :
 So how FUN is this?!?!? 


IDEA #3:

Twizzlers?? Yes please!


Like I said. . . SIMPLE.
Just wrap a few in strips of scrapbook paper, set on a 
serving dish, 
or bucket, 
or vase, 
and COMPLETE
How creative!

IDEA #4

Please don't get me started with glass jars and desserts. 
That's a post for another day. It's been my "obsession" as of lately. . . 


and then I saw this. . . 


IDEA #5:


More candy. . SHOCKER.
Sixlets and Candy Sticks wrapped like a flag. . . umm, I'll take two.


IDEA #6:

Okay and finally, the berry that isn't really a berry . . . 
STRAWBERRIES!
You can do so many things with these but I thought I would share this one with you. 
You can see how to make them HERE


Hope you do something memorable and spend some
 fun-filled, quality time with your friends and family!

Wednesday, June 29, 2011

Confession and Question

Starting with the Confession :

I like to paint . . . Walls . . .  A lot. Ask anyone.


I don't know what it is about it, but when I feel stressed,  or bored, or want to be creative, I always resort to picking a blank wall, choosing a color, finding a paintbrush, and begin taping off (with frog tape, of course).

And no, it isn't the paint fumes.

It's more of, you can:
  • express yourself using colors
  • see a before & after
  • change the whole mood of the room
  • feel like you've given your arms a good (and much needed) workout
  • choose the paint color just because you love it's name (Sometimes it works, and sometimes . . . not so much)
A LITTLE HISTORICAL STORY

It began when I was 7.

We moved to Bartlesville, Oklahoma, USA. This house, let me tell you, was the definition of a wallpaper-happy home! EVERY wall in the house had wallpaper, and not just one layer. Oh no, it couldn't be just that easy. It was more like two layers and I am even tempted to say some had three layers, but that would probably be a bit of an exaggeration (Although I wouldn't be surprised if there was, and I am just blocking it out of my memory).

The hatred for Wallpaper and the love for Paint was planted.

(Slight confession #2, I do contemplate wallpaper now,  as an accent wall, ONLY.  Entire house, NEVER)

Painting Experience 1: Age 7. 

My bedroom. . . drum roll. . .  was black and white checkered wallpaper with drag racing cars all over it. You got dizzy just looking at it. So, long story short, my room was painted a carnation pink with mint green furniture. (Yes, girly, extremely girly).

(Hopefully  a BEFORE photo To Come. I'll have to do some diggin'.)

AFTER


Painting Experience 2: Age 12.

Shortly after I got tired of that, I begged my mom for years (yes, years) to let me paint it something "more mature". Turquoise, Orange, Yellow, and Lime Green. (Wait, did I say "more mature"?!?!) Of course I loved it at the time. It was a "when you can't choose one, why not have them all" decision.

Notice the remaining mint green furniture ( :

Painting Experience 3: Age 14

Moved to Norman, Oklahoma. Bedroom was a blank white slate and my dad would have preferred to keep it that way ( : I on the other hand, had matured a whole two years and decided that I would choose just one color. What an improvement. Just the Lime Green this time. eh.

Former Rocky Yoshi Mister DiGiorgio taking a nap in the Serene Lime Green room.


Painting Experience 4: Age 18

Go to college and move into one of Grandma's apartments on campus, but first. . . paint every wall. Neutrals. (I finally learned.)

BEFORE 
AFTER

Skip a few years, get married, live in a townhouse where you CAN'T paint. Ugh.

Then, finally. . . buy a house with light beige walls EVERYWHERE! Can we say, a CLEAN CANVAS just askin' to be painted?

Umm, yes.

Painting Experience 5, 6, 7, and so on. . . 


Here we are,

told you ALL OF THAT to just basically say, summer is here and I'm getting an itch for painting again. . .

And after doing A LOT of this,


your input would be appreciated.


Ending with the Question:

Martha Stewart's Lemon Ice?

Don't know if it's the color I like, or if it's just the name. hah!

Or more visually,

Notice how different the colors look on the walls versus the swatches
due to the different lighting (. . . and low quality camera)! CRAZY!

Thursday, June 23, 2011

Slice of Tasty : Brussels Sprouts

Brussels sprouts and tasty probably don't seem to go together, but after you try this recipe, you may think different!

The hubby politely ate the dish and said it tasted. . . "healthy", which put a smile on my face and made me giggle, because we all know it wasn't beans and cornbread, or biscuits and gravy, which he would have rather had. And I know, it was probably too girly of a dish and should not have been the main course, but hey, it was "healthy"!

I, on the other hand, LOVED it! I honestly didn't think brussels sprouts could ever be prepared to where I would crave them, but this dish did it. So try it and fogetaboutit ( :

I have to give credit to Williams-Sonoma's Dinner Parties, for the recipe, which I of course then "tweaked" a bit.


How attractive is that dish! 
What you need:
1 lb Brussels Sprouts
1 Sweet Onion
1 TBS butter
EVOO to taste
Balsamic Vinegar to taste
Pancetta or Bacon (optional)
S & P to taste

Chop the onion up in thin slices and saute it with roughly 1 tbs of EVOO and 1 tbs of butter, for about 20 minutes or until golden brown. Set aside.
Wash the brussels sprouts and remove any bad leaves (if you cook them the day you buy them, you don't have to worry about it, because there shouldn't be any). Then slice them in half and mix them with salt, pepper, EVOO, and about 1 tbs of the vinegar. Place them in a single layer on a baking sheet and roast them at 450 F for about 15-20 min or until they are tender when pierced and edges are lightly brown.

Once they are done roasting, mix them with the onions and another tbs of vinegar while heating it on the stove for another few minutes until all of it is mixed and then serve it up!

(If you add the pancetta or bacon, cook the meat first and then add it at the end when you mix the sprouts with the onions, and you can also saute the onions in the meat grease, but that would make it less "healthy", but of course more flavorful).

Seriously, try it. Don't let the sprouts scare you. It is quite simple, and will definitely be made again in this household (although it might be for lunch, while the hubby is at work : ) )

Notice I roasted mine a bit longer for added crispiness, and don't notice the quality of my photo taken with the magnificent LD (low definition) Iphone camera itself!

Friday, March 25, 2011

Lately. . .

Yikes! I've been a stranger to my blog.

Let's see, since my last post. . . .

Valentines Day has Come and Gone


The Entry wall became Pumpkin

BEFORE

AFTER
Spring has Sprung . . .
The Kitchen shelves were moved
BEFORE

AFTER

Smoothies became a daily MUST
Spinning and Running toward a Beginner Triathlon!

And Wedding Season has BEGUN!!!

Friday, February 4, 2011

Laundry Room Fun

Normally I would never take time to paint a laundry room. . . but since we are now going on snowed-in day No. 4, and we had some sheet rock work done to it last fall, (due to some minor water damage), I decided to take on the project. Now, because the laundry room is never really seen, I thought I would be creative and have some fun with it.

A couple chevron walls from my "b-boppin" inspirational folder :


LOVE, LOVE, LOVE this Wall
 

You can do this in just about any room.


 Step 1. Pick your wall (Mine, as mentioned earlier is a wall in the laundry room)


 Step 2. Measure out how many lines you want, then tape off. This is the trickiest and most time consuming part. I use FROG tape (I don't know what I would do without it). Having a level laser helps too.


 Step 3. Take a razor knife and cut the excess tape to get a smooth point


 Step 4. Paint your desired color between every other section. I chose a blue, which totally turned out gray!


 Step 5. By FAR the best part. . . REMOVE the tape and see your CREATION.


I LOVE leaving this door open now!